Showing posts with label chocolate. Show all posts

Saturday, November 22, 2014

Christmas Gifts


This last class I taught at the scrapbook store, we focused on fun and quick gifts for Christmas.  So here is a quick recap! 
Above, is a little kit with sugar cookie mix, hot chocolate mix, sprinkles in little containers, and dried marshmallow bits in an ornament.  I also added some chocolate dipped spoons.  You can see the original idea on pinterest here.

Next is a fun item you can pop in the mail for not very much.  Cotton candy, dressed up!

I just got a container of cotton candy in the christmas aisle at walmart.  It only weighs a few ounces, so you can mail it as a first class parcel for just a couple of dollars.  I wrapped it around with some kraft paper and a cute scrapbook piece, and it's ready to go.  

Here, on triedandtrue, I found one of the cutest ideas ever!
It is an EOS lip balm as a rudolph nose!  You can go to her site for the free printable.  Also, one of the ladies in my class found the Walgreens brand of lip balm in the same shape, but it is shiny!  Like Rudolph's nose.  So cute.

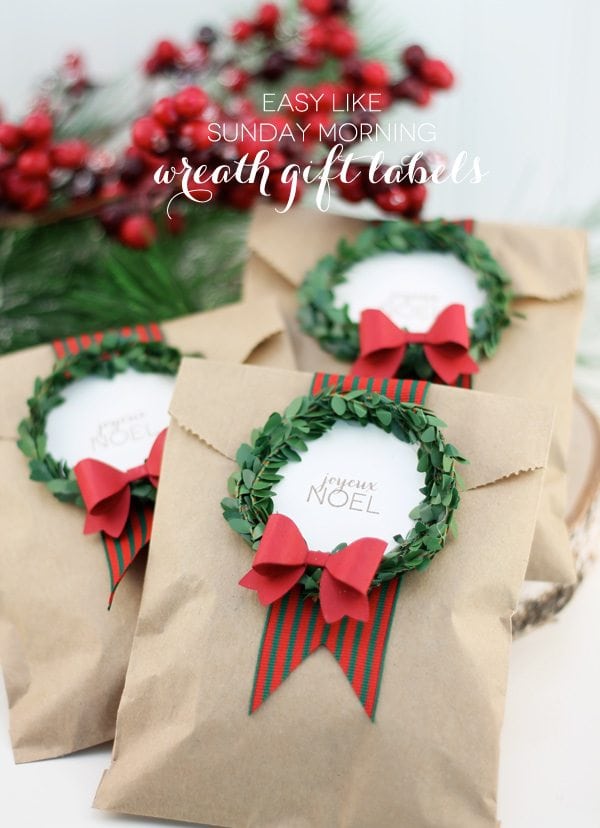
Another quick project we did was originally found HERE, on damasklove.  A great way to jazz up a kraft bag.
We also made these
which can be found HERE on bubblynaturecreations.  I used the dip mix recipes from this blog budget101.  We used the onion dip, fiesta dip, and copycat hidden valley ranch, but there are several others to choose from.  

I also showed the ladies one of my fave gifts, hot chocolate on a stick! 
The original post on this cute project is HERE.  This amazing idea is from giverslog, whose author AmberLee owns this shop HERE.So if you don't feel like DIYing it, she has some great gifts that will make any chocolate lover happy.

One last idea, was a gift card snow globe.  

HERE is the original post from smartyhadaparty.

I'm going to be making a few of these!  If you have specific questions about any of these projects, just leave me a comment!

Wednesday, January 18, 2012

Kitchen Treats

So we all know that I love to create.  And cook.  And often I create through cooking.  I love to make things that bring happiness to other people.  So when I saw this fabulous idea for hot chocolate on a stick, I knew I had to try it!  So here is my first attempt at making this treat.  


I just used ice cube trays for the chocolate mold-not super cute, but the only thing I had to use.

So maybe I don't have a bright future as a chocolatier, but I know where to find cute stuff to wrap treats in!
Glassine bags from garnish, one of my favorite new online stores!  Even their receipts are cute!


And of course, I had to put the marshmallows in cute packaging as well!  I used peppermint mini marshmallows, and vanilla caramel marshmallows.
clear candy tubes from garnish

I put everything in this super cute kraft box and tied it up with a bow!  Who wouldn't be excited to get this in the mail?  I hope it tasted all right.  Although, I think some of my nieces and nephews just ate the chocolate right off the stick instead of making it into cocoa!  :)  Whatever works!
kraft boxes from garnish
I hope to send a few more treat packages out this year.  Just for fun!  So you know that I am thinking of you!

Wednesday, September 14, 2011

Peanut Butter Cupcakes in a Jar

I thought it would be fun to send college boy some homemade goodies and I came across this recipe online.


Peanut Butter Cupcakes in a Jar


First, you need some 8 oz. canning jars.  These are the wide mouth ones, so they are short and squat.  Grease with shortening or spray with cooking spray.  Preheat oven to 350 F.  
 Then make your peanut butter mixture.  I thought this would be super complicated.  It's not!  It is just peanut butter and powdered sugar.  Mix well.
 Next, make your cupcake batter.  I cheated and just used a devil's food mix.  You can use your favorite recipe for chocolate cupcakes,  if you want.
 Fill each jar with 3-4 tablespoons of cake batter.  
 Then add a scoop of the peanut butter goodness.  About a 2 inch ball.  It should look like this.
 Then add a few more tablespoons of batter on top of the peanut butter stuff.
Bake at 350 for 15-20 minutes or until the top springs back when you touch it. 
And then...
I should have a picture of the finished product here, but I forgot to take one.   When they come out of the oven, you could frost them, or pour melted Dove chocolate over them.  I topped them with chocolate chips, thinking that they would melt and spread.  Didn't happen.  So next time, Dove chocolate it is!  They were still pretty tasty!  And I was able to just twist on the lids, wrap them in bubble wrap and mail in a flat rate box.  That is important, since they were heavy and I didn't want to spend 40 dollars on shipping!


Here is the complete recipe:

12 8 oz canning jars with lids
Canola oil spray
8 oz. peanut butter
1 1/2 cups powdered sugar
1 recipe cupcake batter
8-10 oz dark chocolate

Preheat oven to 350.  Spray the inside of the jars with oil.  Mix peanut butter and sugar until smooth.  Roll or scoop into 2 inch balls.  Scoop 3-4 T batter into each jar, then the peanut butter ball, then top with 2-3 T. batter.  Bake on cookie sheet for 15-20 minutes.  Remove and put chocolate on top.  Spread.

Thursday, September 1, 2011

yummy treat

We had some friends come for dinner and I made this awesome ice cream cake!  The recipe was from southern living august.
  Yum.  It is 106 F right now. I could sure go for this.
Here is the recipe and the link for southern living.

Mint Chocolate Chip Ice Cream Cake


Ingredients

  • Parchment paper
  • Devil's Food Cake Batter ( I used a box cake mix)
  • 1/2 gal. mint chocolate chip ice cream, softened
  • 10 chocolate wafers, coarsely crushed
  • Chocolate Ganache 
  • Garnishes: sweetened whipped cream, thin crème de menthe chocolate mints

Preparation

  • 1. Preheat oven to 350º. Grease and flour 3 (8-inch) round cake pans. Line with parchment paper. Prepare Devil's Food Cake Batter, and spoon into pans.
  • 2. Bake at 350º for 12 to 14 minutes or until a wooden pick inserted in center comes out clean. Cool in pans on a wire rack 10 minutes. Remove from pans to wire racks, peel off parchment paper, and cool completely (about 1 hour).
  • 3. Place 1 cake layer in a 9-inch springform pan. Top with one-third of ice cream (about 2 1/3 cups); sprinkle with half of crushed wafers. Repeat layers once. Top with remaining cake layer and ice cream. Freeze 8 to 12 hours.
  • 4. Remove cake from springform pan, and place on a cake stand or plate. Prepare Chocolate Ganache, and spread over top of ice-cream cake. Let stand 15 minutes before serving. Garnish, if desired.